 Skip to content
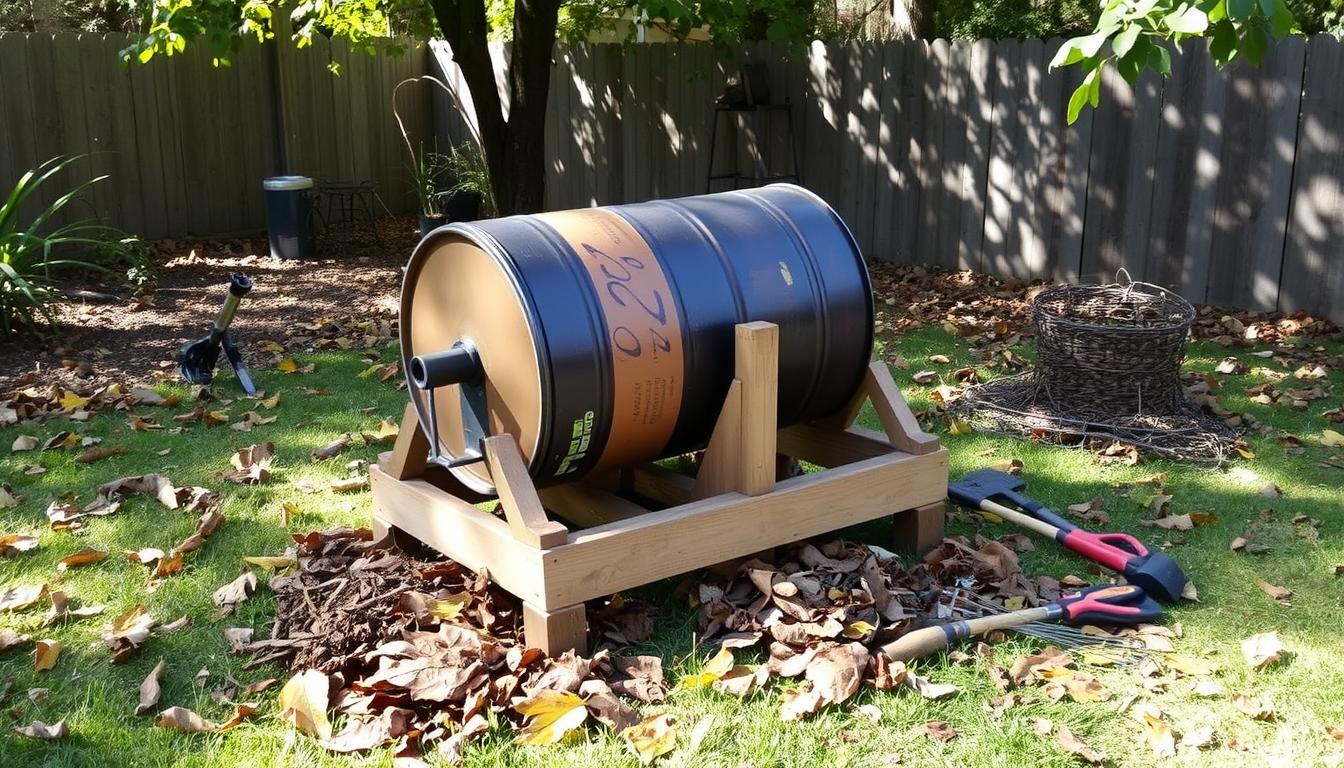
Turning a 55-gallon drum into a homemade compost tumbler is a great way to make soil for your garden. It’s a DIY project that’s not too hard but still rewarding. It takes a day to do and costs between $101 to $250. This makes it a good choice for those who want to recycle and compost.
Table of Contents
If you love gardening or just want to help the planet, making a compost tumbler is a useful skill. It’s a way to turn waste into something valuable for your garden.
Key Takeaways
- Building a compost tumbler from a 55-gallon drum is an intermediate-level DIY project.
- The project takes a full day to complete and costs $101 to $250 for materials.
- Tools required include a 4-in-1 screwdriver, clamps, cordless drill, drill bit set, jigsaw, miter saw, pocket hole jig, rivet gun, and safety glasses.
- Materials needed include aluminum stock, treated lumber, casters, PVC pipe, handles, hinges, latches, and stainless steel nuts and bolts.
- The compost tumbler provides a cost-effective and sustainable solution for recycling organic waste into nutrient-rich soil.
Understanding the Benefits of a DIY Compost Tumbler
Composting turns organic waste into rich soil, key for organic gardening and eco-friendly gardening. A DIY compost tumbler is a great way to compost efficiently. It has many benefits over old methods.
Accelerated Decomposition Process
Compost tumblers speed up decomposition by adding air pockets with daily turns. This makes composting quicker and easier than using a shovel.
Cost-Effective Garden Solution
You can make a DIY compost tumbler from common materials, often for the same price as store-bought ones. Building your own lets you create a strong, tailored solution for your garden.
Environmental Impact
Using a DIY tumbler for composting helps the planet. It turns kitchen and yard waste into fertilizer, cutting down on chemical use and landfill waste.
| Composting Benefits | Description |
|---|---|
| Nutrient-Rich Soil | Compost gives plants the nutrients they need, making soil better for growth and water. |
| Waste Reduction | Composting keeps organic waste out of landfills, cutting down methane and saving space. |
| Cost Savings | Homemade compost can save money on expensive fertilizers and soil fixes. |
| Environmental Benefits | Composting supports green gardening and cuts down on chemical use. |
DIY compost tumblers offer many benefits for organic gardening. They help make gardening more sustainable and eco-friendly.
Required Tools and Materials List
Building a DIY compost tumbler from a 55-gallon drum needs specific tools and materials. This list makes sure you have everything for a strong and useful DIY composter in your backyard.
You’ll need a cordless drill, drill bit set, jigsaw, miter saw, rivet gun, and safety glasses. For materials, get 1″ flat aluminum stock, treated lumber (10′ 2×8, 12′ 4×4, 8′ 2×4), 3″ casters, 6′ of 4″ PVC pipe, exterior screws, handles, hinges, latches, stainless steel nuts and bolts, and aluminum rivets.
This DIY composter project takes a full day to finish and is for intermediate skill levels. The cost for tools and materials is between $101 and $250. This is cheaper than buying tumbling composters, which cost $150 to $400 on average.
By buying the right parts and following the instructions, you can make a strong and custom DIY composter. This project saves money and lets you make the compost tumbler fit your needs. It makes recycling more efficient and rewarding.
Selecting the Right 55-Gallon Drum
The 55-gallon polyethylene drum is key for a DIY compost tumbler. You can find these drums easily, making your composting eco-friendly and affordable. Let’s look at where to find the best drum and how to get it ready.
Sources for Obtaining Drums
People who love recycling can get 55-gallon drums for free or cheap. Try contacting car washes, food plants, or big manufacturers. They might have drums to give away. For specific colors or new drums, you can buy them from container companies.
Safety Considerations for Used Drums
Used drums need a good clean to avoid harm. Check them for damage or dirt before starting. A clean drum is safe and good for the environment.
Drum Preparation Steps
- Wash the drum with warm soapy water to remove dirt and old stuff.
- Rinse it well and let it dry completely.
- Look for cracks, holes, or damage that could weaken the drum.
- If it’s in good shape, it’s ready for your compost tumbler.
Choosing the right 55-gallon drum and preparing it well gives you a strong base for your compost tumbler. This careful step makes composting safe and green.
Creating the Mounting System
Building a homemade compost tumbler from a 55-gallon drum needs a strong mounting system. This ensures the whole thing stays stable and secure. It’s a key step to make the frame that holds the rotating drum, making composting easy and efficient.
To start, cut a door panel with a jigsaw, a bit smaller than a wheelbarrow. This door lets you easily get into the compost tumbler. Then, reinforce the door opening with 1/8-inch x 1-inch flat aluminum stock, bent around the drum. Use rivets or nuts and screws to attach it, making sure 1/2-inch sticks out into the door opening.
For extra strength, add more flat aluminum pieces on top and bottom of the door opening. This keeps the compost tumbler’s structure solid, stopping it from warping or bending while composting.
Customizing the drum and building the stand for this homemade compost tumbler takes a whole day. The materials, like 1-inch flat aluminum stock, treated lumber, casters, PVC pipe, and hardware, cost between $101 and $250. This makes the DIY composter a budget-friendly choice compared to buying a commercial one, which can cost $150 to $400.
Installing the Door and Hinges
Building a DIY compost tumbler from a 55-gallon drum needs focus on the door and hinges. The door should be a bit smaller than a wheelbarrow to make emptying easy. Use aluminum strips to support the door opening and stop it from warping.
Mount hinges at the bottom of the door opening. This way, the door drops down when you empty the compost. It makes the process easier and more comfortable. Also, install strong latches to keep the door closed when you’re using the DIY composter. This stops spills during tumbling.
Door Size and Placement
The door should be a bit smaller than a wheelbarrow, about 18-20 inches wide. This size makes emptying the compost easy. Place the door in the center of the drum for balanced access and weight.
Reinforcement Techniques
- Use 1-inch flat aluminum stock to reinforce the door opening.
- Secure the aluminum strips to the drum using a rivet gun or exterior screws.
- This reinforcement will help prevent the door opening from warping or becoming misshapen over time.
Hardware Installation
- Install heavy-duty hinges at the bottom of the door opening, ensuring the door hangs down when opened.
- Attach sturdy latches, such as hook and latch systems, to securely fasten the door when the recycling bin is in use.
- Ensure all hardware is properly fastened to prevent any compost spillage during the tumbling process.
Building a Homemade Compost Tumbler Support Frame
For those who love gardening or care about the planet, making a homemade compost tumbler is a great project. It’s not only fun but also saves money. A key part of this project is building a strong support frame for the 55-gallon drum. This frame is crucial for keeping the drum stable and easy to turn, which helps with efficient sustainable living.
To build the support frame, you can use treated lumber. Use 4×4 posts for the main structure and 2x4s for the cross-bracing. This design is strong and keeps the drum from falling over. It also makes it easy to turn the drum, making composting simple.
- First, measure and cut the 4×4 posts to the right height. Make sure they are level and firmly in the ground.
- Then, attach the 2×4 cross-bracing to the 4×4 posts. This creates a solid and stable frame.
- Add casters or wheels to the base of the frame. This makes it easy to move the compost tumbler around.
- Next, secure the 55-gallon drum to the frame. Make sure it fits tightly to prevent any movement.
- Finally, add any extra support or decorations to make the frame your own.
With your support frame ready, you have a solid base for your homemade compost tumbler. It’s time to start your journey towards a more sustainable living lifestyle. Enjoy the process of creating your own composting system and helping the environment.

Adding Ventilation and Drainage Holes
Creating a DIY compost tumbler involves a key step: adding ventilation and drainage holes. These holes are crucial for airflow and managing moisture in the 55-gallon drum.
Optimal Hole Placement
Drill 15-20 holes, about 1/4 inch in diameter, around the drum. Place them evenly on the top, bottom, and sides. This ensures oxygen flows well, speeding up decomposition.
Size and Spacing Guidelines
The hole size and spacing are important. Use 1/4-inch diameter holes, spaced 1 to 2 inches apart. This balance helps with airflow without weakening the drum.
| Compost Bin Type | Recommended Hole Size | Optimal Hole Spacing |
|---|---|---|
| 55-Gallon Drum Compost Tumbler | 1/4 inch diameter | 1 to 2 inches apart |
| Plastic Storage Bin Compost Bin | 1/4 to 1/2 inch diameter | 1 to 3 inches apart |
| Wooden Pallet Compost Bin | 1/2 to 3/4 inch diameter | 2 to 4 inches apart |
With these holes, your compost tumbler will have better airflow and moisture control. This leads to efficient composting and rich compost for your organic gardening.
Constructing the Turning Mechanism
Building a homemade compost tumbler from a 55-gallon drum needs a good turning mechanism. This part makes mixing and aeration of compost materials easy. It also helps in rotating the drum for better decomposition.
To make the turning mechanism, you’ll need a few things:
- 2 pieces of 1/2″ metal or aluminum pipes, each 6-8 inches long
- 1 piece of 1/4″ steel threaded rod, about 12-14 inches long
- Nuts and bolts (stainless steel) to hold the pipes to the drum
First, drill holes in the center of each pipe for the rod. Then, put the rod through the holes to make an axle. Place the pipes on the drum’s sides, making sure they’re straight and in the middle. Use nuts and bolts to attach the pipes to the drum, making it strong.
This turning mechanism makes it easy to turn the drum. This ensures the compost is well mixed and has air. Turn the drum once a day to keep the compost decomposing well.
Adding this mechanism to your DIY composter makes composting efficient and rewarding. You’ll get nutrient-rich soil for your garden easily.
Installing Interior Mixing Fins
To boost your composting in a homemade tumbler, think about adding mixing fins inside. These tools are simple yet powerful. They make your organic gardening work more efficient.
Attach a metal sheet inside the barrel, shaped like an “L” and bolted to the wall. Place it opposite the hatch to keep the tumbler balanced when it’s empty. As it spins, the fin mixes the composting stuff well. This speeds up decomposition and makes the compost more even.
- Choose a piece of galvanized sheet metal, about 6-8 inches wide and as long as the barrel’s diameter.
- Bend the metal into an “L” shape, with the long part sticking out and the short part against the wall.
- Drill holes in the short part and bolt the mixing fin to the barrel’s inside.
- Put the fin on the other side of the hatch for even weight when the tumbler turns.
Adding these mixing fins can greatly improve your homemade compost tumbler’s performance. They help mix the materials well. This way, you’ll get a steady flow of rich compost for your garden.

| Feature | Benefit |
|---|---|
| Mixing Fins | Ensures thorough blending of compost materials for faster, more uniform decomposition |
| Strategic Placement | Positions the fins opposite the hatch to balance the weight of the empty tumbler |
| Galvanized Metal Construction | Provides durability and rust resistance for long-lasting performance |
Weatherproofing and Maintenance Tips
Keeping your compost tumbler in good shape is key for eco-friendly gardening and sustainable living. To make sure your DIY compost tumbler lasts long and works well, follow these weatherproofing and maintenance tips:
- Use a weather-resistant coating or sealant on the wooden frame. This protects it from sun, rain, and other environmental factors.
- Check the drum often for cracks, damage, or warping. Fix any problems right away to keep your compost tumbler strong.
- Make sure to clean the ventilation holes regularly. Good airflow is crucial for composting.
- Oil the turning mechanism when it gets stiff. This makes turning the tumbler easy and convenient.
- Check and tighten all bolts and screws often. This keeps your compost tumbler stable and secure.
By doing these simple maintenance tasks, you can make your compost tumbler last longer. Enjoy the perks of eco-friendly gardening and sustainable living for many years.
| Maintenance Task | Recommended Frequency |
|---|---|
| Apply weather-resistant coating | Annually or as needed |
| Inspect the drum for damage | Monthly |
| Clean ventilation holes | Every 3 months |
| Lubricate the turning mechanism | As needed |
| Tighten bolts and screws | Every 6 months |
Best Practices for Using Your Compost Tumbler
Composting is a great way to make nutrient-rich soil from kitchen and yard waste. Using a DIY compost tumbler can be very effective. Here are some tips for the best results.
Loading and Mixing Ratios
For good composting, you need the right mix of “green” and “brown” materials. Aim for 2-3 parts browns to 1 part greens. Examples include:
- Greens: fruit and vegetable scraps, coffee grounds, tea leaves
- Browns: dry leaves, shredded paper, sawdust, straw
Rotation Schedule
Turning the compost tumbler regularly is key. Do this at least once a day. It helps mix and aerate the compost, speeding up decomposition.
Moisture Management
Keeping the compost tumbler moist is important. It should be as damp as a wrung-out sponge. If it’s too dry, add water. If too wet, add more browns to soak up the moisture.
By following these tips, your compost tumbler will make rich compost. This will help your garden grow and reduce waste.
Conclusion
Building a homemade compost tumbler from a 55-gallon drum is a smart and green way to make compost for your garden. This project is about recycling and composting efficiently. It helps you turn kitchen and yard waste into valuable soil.
With a simple guide, you can make a compact compost tumbler. It speeds up the composting process, giving you compost in just a week. This DIY project is affordable, costing between $100 and $500. It’s great for gardeners and those who care about the environment.
Using a homemade tumbler for composting is good for your garden and the planet. It cuts down on landfill waste and supports good microbes. It also helps keep carbon in the ground, leading to healthier soil and more food. Start composting and show your support for a greener world with your homemade compost tumbler.
